Friday, July 22, 2016

Leak Proof Plastic Bag Experiment

Today we did an awesome science experiment! It was quick to put together and had a big impact. I am certain that your kids will love this, no matter what age they are!


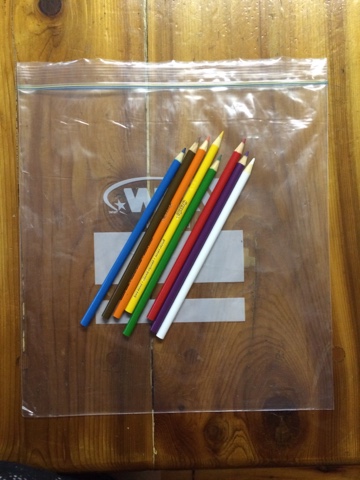
Supplies: ziploc bag, sharp pencils, water


All morning we had been talking to Monkey about the science experiment we'd be doing today. We told him that we were going to poke some pencils into a bag of water, and kept asking him what he thought might happen. Of course, he predicted that the pencils would make holes in the bag and the water would come out. 

The first step in the experiment is to fill the bag with water. We filled it about 3/4 full. 


We took the bag outside with the pencils. Now for the magical part! (Ok, it's science, but it's pretty impressive.) Carefully poke the pencils through the bag, until the sharpened end goes through the water and starts to come out of the other side. 


I did the first pencil to show Monkey what to do, and he did all the rest by himself. 


We all thought this was so cool! The outcome is so unexpected, even for the adults. 


The science behind this is that the pencils push apart the plastic strands in the plastic bag enough to get through, but the strands seal themselves back tightly around the pencil, which is why the water doesn't leak out. 

It was just as exciting when Monkey started to take the pencils out, because he knew that the water would leak out for sure when he pulled them out. 


We did this on the deck with our bathing suits on, but it could easily be done over the sink or in the bathtub. 

This was a fun one! Perfect for a hot day :) 

Mar 

Wednesday, July 20, 2016

Nature Scavenger Hunt

A couple of days ago my husband went for a bike ride at the cottage and found an old car abandoned in the forest. Obviously he thought it was awesome and couldn't wait to take Monkey to see it. I knew it would be the perfect opportunity for Monkey to do this nature scavenger hunt I had been saving to use at the cottage - but you could do this scavenger hunt almost anywhere outdoors (the park, your favourite hiking trail, etc).


Supplies: nature hunt printable (free from link above, printed on cardstock), marker, magnifying glass 


We didn't play this as a bingo game, but instead Monkey tried to cross off as many as he could. 

Monkey always loves running around with his magnifying glass, and he was extra excited to have it at the cottage. Before he left with his Daddy, he was already trying to find things to cross off his list. 


Once they finally made it to the abandoned car and walked around, they were able to cross off about a third of the items on the list. 


How cool is that car?! 

This activity was a huge hit with Monkey. He's gone back to the old car with his dad two more times, and he always insists that they bring his list and magnifying glass. He's seen almost everything by now. 

A big thanks to my husband for taking pictures for me to use for this post!

Mar

Tuesday, July 12, 2016

Nature Mandala

This morning we did a big adventure! Well, for the three of us it was :) We drove down to the Ottawa River and took a walk along the path that runs on the shore beside it. Along the way, Monkey kept noticing different nature objects, and when he wanted to start collecting some, I knew exactly what we could do with them! 

A mandala is a circular geometric pattern that represents the universe. (The background is religious or spiritual.) For children, making a mandala uses a lot of mathematical thinking because they are a beautiful example of radial symmetry. 

Supplies: loose parts - we used found natural objects, but any collection of loose parts will work


We started with the biggest rock right in the middle of our mandala. After that I let Monkey choose which objects we would use next. He needed help to get the first few started in terms of placement, but after we had the long grass laid out, he could see better where to place the objects so that they were the same. 


We kept working until we had used all the objects Monkey found. We had collected eight of everything, but I think six of everything would have worked a little better. 


This mandala is definitely a Mommy & Monkey work of art. But we think that made it even more special. 


We left it on the beach, and I hope it put a smile on the face of anyone else who walked by!


Mar 

Thursday, July 07, 2016

Salt and Water Colours Fireworks

Today is Monkey's grandmother's birthday! So of course we had to make a card to celebrate. When I asked Monkey what kind of picture he wanted to put on the card he said, "Oma loves fireworks!" So I started looking for fireworks art and found this. We've actually used this technique before, but it didn't turn out so great and I didn't blog about it. But I figured we could give it another shot. 


Supplies: watercolours, white glue, salt, paint brush, black construction paper, baking tray 


The first step is to use the glue to draw a picture; in our case, fireworks. I wrote the number 60 and Monkey drew the fireworks. 


Once we were done using the glue to draw the number and fireworks, Monkey covered it all with salt. He was very generous! The glue needs to be completely covered. I used the baking tray so that we could shake all the extra salt off without making a mess. 


I noticed that we either used too much glue or the construction paper just isn't strong enough for this art process. If I use this technique again, I will use cardstock or cardboard. 

Once the glue was covered with salt and we had shaken all the excess off, we left it to dry for about two hours. 


Next, we set up the paint. For this activity, I ran water right over our watercolours tray. I wouldn't typically do this because it gets messy fast, but I knew it would help Monkey. 

He used the paint brush to drop/paint the  watercolours on the salt. 


It's neat to watch the salt absorb the watercolours - a science twist in this art activity. The colours bleed together, too. 


It took another couple of hours for the paint to dry. Once it was, I used a white pencil crayon to write a birthday message. The construction paper was really being put to the test, so to be safe I actually glued a piece of cardstock to the back. 


Oma loved her card :)

Mar 

Wednesday, July 06, 2016

Handprint Art for a Grandmother

This week Monkey's grandmother turns 60! We'll be celebrating all week and I have two art activities to share with you. Today's is a canvas art project, and tomorrow's with be a birthday card.

I got the idea for this handprint art here: http://www.craftymorning.com/heart-handprint-canvas-grandma/

Supplies: paint, paint brushes, canvas, painters tape, Sharpies 


The first thing to do is tape up the canvas in the shape of a heart. To do this I made a large square of tape on a piece of cardboard and then drew on a heart shape. 


I used an exacto knife to cut the shape of the heart and discarded the inside section. 


Finally I transferred the heart outline to the canvas. This was tricky with two hands and I was happy my husband was close by to help! 


The next step was to do the boys' handprints all over the heart. We did Monkey's hands six times (one for each colour of the rainbow) and then repeated the process with Peanut's hands.

There are no pictures of the process but here is what the canvas looked like after we were done with the handprints. 


When I started to take off the painter's tape, some of the heart didn't have a very distinct outline, so I traced he heart with a black Sharpie before taking the tape completely off. 


Finally, I added the following quote around the bottom of the heart: "Omas create memories that the heart holds forever." (The original quote said grandmothers, but Monkey and Peanut call my mom Oma [it's Dutch]). 


I wrote their names and the date on the back too. And of course, their grandmother loved it - who wouldn't!? 

Mar 

Monday, July 04, 2016

Q-Tip Blow Dart Game

Today's activity is brought to you all the way from the cottage! We're visiting with family at my grandparents' cottage this week. I wanted to find an activity to do with Monkey that I might be able to convince my cousin (age 14) to do, too. I thought this game was perfect!

I saw the idea here: http://kidsactivitiesblog.com/59145/q-tip-blow-dart-game#_a5y_p=2361209

Supplies: q-tips, plastic cups, straws 


Since I figured quite a few family members would end up wanting to play, I labeled the straws with names so that there wouldn't be as much germ sharing. 

The only other set up needed is to stack the plastic cups in a pyramid. Monkey did this quickly for us. 


Now the game is ready!

To play, take a q-tip and slide it inside your straw. Then put the straw in your mouth, aim for the cups, and blow out the q-tip. 


This was not an easy game for Monkey. He kept hitting the bottom rows of cups and they were too strong for the q-tip to make an impact. But he was having way too much fun to give up, or care!

Soon he got better at aiming and was able to knock the cups down at the top. 


Peanut wanted to play too, although he didn't follow the rules. 


Everyone (teenagers and adults included) had fun playing this game. When we were finished playing all the materials were still in great shape, so I packed them all up in a ziploc bag and now we can play again another time. 

Mar